Tuesday, May 31, 2011

Starry Silver Skies

I have a problem with glitter nail polish.  I just can not leave a mani alone without a coat of glitter polish over the top.  What can I say- this girl likes bling.

Anyways, here is my mani of the moment: 
I painted my nails with three coats of Revlon's Silver, a cream gray color.  I had some trouble with this formula just like I did with Rock.  There was ton's of streaking with the first coat and when it dried there was tons of bubbles.  I had to paint my nails three times in order to get an even color coat, but there was still tons of bubbling.  

I decided to do a glitter topcoat to mask the bubbles.  I painted over Silver with three coats of NYC's Starry Silver Skies.  Starry Silver Skies has tiny silver micro-glitter mixed in with larger blue and pink hexagon glitter pieces.  I love this nail polish and usually wear it all by itself instead of over another color.  Another two coats of Sally Hansen's Hard as Nails clear coat and I'm ready to go.

Are you a fellow glitter addict?

Bubblicious,
Cherrie

Monday, May 30, 2011

Franken Polish!

So what exactly is a franken polish?  It's nail polish that you custom mix yourself-taking a little bit of this and a little bit of that - thus the term franken from the ever so famous Frankenstein monster. 

So cool right?  I had to try this for myself.  If you've been following my blog since it's birth, you will know that I love glitter nail polish.  So my franken polish, of course, has to contain glitter!  

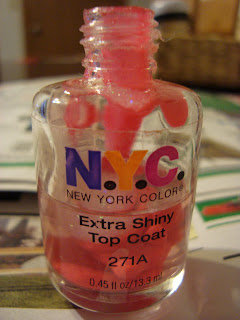
I found an old NYC top coat polish that I don't use anymore because it had become too gloopy.  This bottle would hold my future pink glittery creation.  :)

Then I found some other polishes that I wanted to mix together.  I used this pink-coral color from L.A. Colors to use as a base color.  I then added some glitter polishes that I thought would look great together.  

So first off, I should mention that you want to set up a work station.  I worked at my kitchen table and spread newspaper out just in case of any spills.  I also kept a bottle of nail polish remover near by so that I could wipe off the opening of the fraken bottle before mixing.  

Then, put on your mad scientist face and get to mixing! :D
Here I have all the colors I used all lined up.
1.  Pour pink polish into clear topcoat bottle. 
 2.  Pour your next color of choice into the mix.
 3. Repeat
4.  Put the brush back on top and shake vigorously to incorporate all polishes together.
 Here is the final product!
And swatches of my fraken creation:
I actually thought the color was too bright so I added some white nail polish to the bottle and shook it up some more.  This is the color it became:
Pretty right?!  I loved discovering this technique to custom create your own nail polish!  How cool that no one else in the world has this exact color! Just remember to save your old nail polish bottles so that you can create your own fraken polishes! 
Happy mixing!
Cherrie

Sunday, May 29, 2011

Flower Power- Eye MakeupTutorial

I just bought a new hanging flower pot for my deck.  Here is what the blossoms look like:

Isn't it gorgeous? I love how the buds look like pink paper lanterns right before they open up.  Lovely.

So I was inspired by the beautiful buds for my next makeup look. 
I even managed to take some pictures of what I was doing to create a little tutorial for you all.  Here we go!

1. Prep lid with eye primer.  I used UDPP
2.  Swipe Elf All Over Color stick in Pink Lemonade over lid with your fingers
 3.  Use a fluffy brush pat Nars Orgasm blush into inner corner and bring in halfway to lid
4.  Using a wet angled brush, draw a crease and an outer V with indigo color from Elf Every Day Brights Palette and blend into pink
5.  Use light pink and purples to blend out crease color and add highlight colors to lid
 6.  Line lower lash line with purple pencil.  I used Wet 'n Wild's Idol Eyes pencil.
 7.  Using liquid liners, draw decorative dots around eyes & eyebrows.  I used these liners from Wet 'n Wild.
 8. Line eyes in black liner
9. Add false lashes.  (Lashes are from Dots clothing store)
 10.  Clean up any fall out with a fan brush and loose powder
Final Look:
So I didn't have any bright fuchsia eye shadow which is why I ended up using my blush.  (That's what I get for buying too many neutrals) This was such a lovely color on my lids, but didn't translate into the bright pink of the blossoms in my flower pot.  I applied the indigo color wet so that it would be more intense but that made it kind of hard to blend out also.  In the end, the colors didn't translate like I wanted it to but it still turned out pretty. Another time perhaps, when I collect more colors I can retry this look.  :)

Petal power,
Cherrie

Saturday, May 28, 2011

Oh, Oh, Oh, it's Magix!

This is the foundation that I had ordered from Avon but had to get a lighter shade.  My Avon rep had to back order this for me because I had originally gotten a shade that was much too dark, so I just got it today. I have the shade Medium and paid about $10 for it.  
This foundation is a gel to powder formula and reminds me of the Maybelline Dream Smooth Mousse foundation that I bought and reviewed.  See that review here.  But upon use, I find that the Maybelline formula applies more wet upon the skin and needs loose powder on top whereas the Avon formula is more creamy and dries matte.

This Avon formula claims to leave skin shine free for up to 10 hours- which is something that I need.  I have a very oily T-zone and so I am constantly blotting with my Elf blotting papers.  Having a foundation stay matte all day would be a dream come true.  Another plus- this foundation also has SPF 15 in it. (yay for double duty!)

This formula leaves a nice matte finish, but I always dust loose powder over to seal the deal.  In my opinion, this foundation is better than the Maybelline Dream Smooth Mousse one. 

Formulized,
Cherrie

Love & Beauty!

Forever 21 has recently branched out and has added affordable cosmetics to their line of trendy clothes, jewelry and shoes.  I, of course, being brave made my way to ForLove21 and picked out some items to try and review for the good of womankind.  :) 

First off, I found this five piece eye shadow set.  This comes in a gorgeous sleek gold case.  There were other color combinations available, but I played it safe and went with neutrals.  Here is the palette I picked out:
 Swatches of colors from left to right (swatched dry & w/no primer)
There is a sheer cream color that could be used as a highlight color and then a taupe, a bronze, a rose-gold and then an olive color.
So what do I think?  These are okay.  In my honest opinion, they feel super silky on my lids but really nothing to rush out and buy.  Truthfully, the packaging is what got me.  :)  

I paid $6.80 for this shadow set.  I also went and swatched the Urban Decay Naked Palette in Sephora's right after I bought these and these colors and pigmentations just pale in comparison to the UD one.  *sigh*  I'm still debating if I really need the UD Naked palette...lol. In the meantime, I will try to do a look with these colors and put in a blog entry.

Then I picked out this highlighter.  It reminds me of the Victoria's Secret Love Me Wild Radiant Face Trio's, doesn't it?  Anyways, the packaging is what got me again on this one (I love animal print).  I have been buying bronzers like crazy, trying to figure out one that will work for me but I really don't have anything with these colors. 
I paid $4.80 for this compact.  I haven't used this yet, but did a light swatch and it is pearly and shimmery.  This should work out great as a highlighter.
  
Also picked up some face masks for $1.80 each for future blog/contest giveaways.  
And then lastly, my favorite.  Lashes.  I love false lashes.  Love, love, love.  So it shouldn't surprise you that I would leave the store without any in hand.  Here are the two styles that I picked out:
These lashes were $2.80 each.  When I have time to do a look I will post up pictures of how each of these look like on. 

I only spent $21.96 in all and walked out with all of these goodies.  Sah-weet. 

Leopard print love,
Cherrie

Friday, May 27, 2011

Giving you some lip!

I made the hub make a special stop in Appleton so I could shop at Ulta on our way back home. Here are the goodies I picked out:

6 NYX Lipsticks:
 Swatches from left to right: Paris, Goddess, Fig, Frappuccino, Strawberry Milk, Gardenia
These lipsticks were buy 2 get 1 free at Ulta.  Each lipstick normally retails for around $4.  I like most of them, but Strawberry Milk is too frosty and too pale for my complexion.  

Sorry-the lip swatches are kind of tacky because I was in a hurry to get them all done before I had to go to work so I just applied straight from the tube and swiped off with makeup remover wipes. :/

Prestige Brow Liner in Earth Brown and Eye Pencil in Brown:
I love these to pencils from Prestige cosmetics.  I picked these up originally from Walgreens when Prestige items were all being clearanced out.  I only bought one of each to try because I wasn't sure how I would like them but as it turned out- I absolutely loved them!  I had to go to Ulta to get backups of these.

I also bought some Kiss nail glue because I tore a nail during our little road trip and a mini clear nail polish from a company I had never heard of before called Essence (.99 cents).  I read on Nouveau Cheap's blog though that this company originated in Germany, has made it's way into the U.S. market and sold exclusively at Ulta.  See her blog entry about Essence cosmetics here.  I used these two items to patch up my broken nail.

All of the above only cost me $23.65.  Not bad.

Ultra happy with Ulta,
Cherrie